Showing posts with label EOTD. Show all posts

Thursday, 9 May 2013

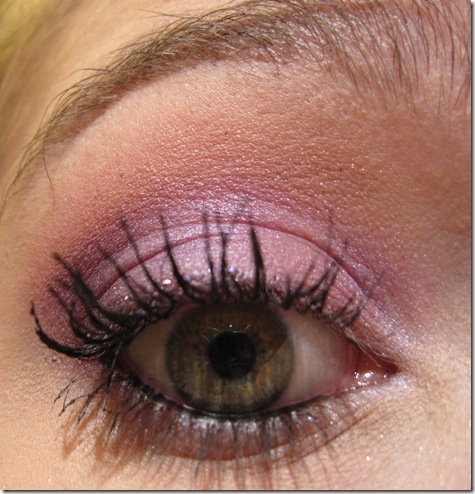
EOTD–Natural eye using Urban Decay naked 2

Hey Bloggers,

Sorry if I have not posted in a little while but I was on vacations in Cuba. Today’s post is going to be about a look I did a couple of days before leaving. This is a very nice look that can be worn everyday if you want to look nice but not overdone. So there are the products used for this look:

- Urban Decay primer potion

- Urban Decay “YDK” eyeshadow (All over lid color)

- Urban Decay “Tease” eyeshadow (In the crease)

- Urban Decay “Busted” eyeshadow (In the outer corner)

- Urban Decay “Foxy” eyeshadow (Highlight)

- Urban Decay “Blackout” eyeshadow (As an eyeliner on upper lashline)

- Sephora collection black eyeliner (waterline)

- Yves St-Laurent Faux-cils mascara in black

So, that’s everything I used for that look. I you liked it you can comment or subscribe. Everybody have a nice day.

Bye,

Mel xoxo

Sunday, 21 April 2013

EOTD–Nearly bare lid with a pop of color using Too Faced natural eye


Hey Bloggers,

How are you today? I’m at university and I am during my exams week so I need a quick look that doesn’t need a lot of blending. I know people are going to think: Why is she even wearing makeup during exams? Even if I don’t do something as elaborated or artistic as what I like to do when I have a lot of time, doing my makeup is something that calms me. I just can’t leave the house without makeup. It’s not because I’m not confident in myself, it’s because it’s just a really important step that brightens my morning. Anyway enough rambling, here’s the look I am wearing today using mostly Too Faced natural eye.

- Urban Decay primer potion

- Mac “Painterly” paint pot

- Too Faced “Silk teddy” eye shadow (All over lid color)

- Too Faced “Velvet revolver” eye shadow (Transition color)

- Too Faced “Push-up” eye shadow (In the outer part of the crease)

- Too Faced “Heaven” eye shadow (Browbone matte highlight)

- Lise Watier “Peacock” eye pencil (Upper lash line)

- Urban Decay “Zero” eyeliner (In the waterline)

- Yves Saint-Laurent Faux-cils (Black mascara)

- Clinique Bottom lashes mascara

So there’s the finish look. I hope you liked it.

Bye, xoxo

Friday, 19 April 2013

EOTD–Natural golden smoky eye using Mac

Hey Bloggers,

Today I’m going to share with you the look I was wearing today. It’s a really nice golden natural slightly smoky eye. So here are the products I used:

- Urban Decay primer potion

- Mac paint pot in “painterly”

- Mac “All that glitters” eye shadow (Inner corner)

- Mac “Amber lights” eye shadow (Outer half)

- Mac “Soft brown” eye shadow (Transition)

- Art Deco “361” eye shadow (crease medium pink color)

- Mac “Private viewing” eye shadow (Outer corner to darken it a little bit. It’s a neutral purple color)

- Smashbox cream colored matte brow bone highlight shade (I don’t have the name)

- Urban Decay 24/7 “Rockstar” liner (upper lash line)

- Sephora black liner (The one in the lipstick tube applied in my waterline)

- Yves Saint-Laurent faux-cils mascara

- Clinique bottom lashes mascara

So that’s it for today’s look. Hope you liked it and thanks for reading.

Bye xoxo

Monday, 30 January 2012

EOTD–Urban Decay Naked2

Hey bloggers,

This is a look I created using Urban Decay’s Naked2 palette. This is more of an evening dramatic look because of the super long winged liner and the thick dark lashline.

Theses are the steps to recreate the look:

1. I applied Urban Decay Primer potion to the lid.

2. I used a dark brown pencil liner to draw the shape of the crease and wing it out.

3. I used Busted to blend the crease color up.

4. After, I used Tease to blend it up even more.

5. I applied foxy as a matte highlight shade under my brow.

6. I then used YDK all over the lid making sure not to go over the crease colors.

7. I applied Blackout to my lower lashline.

8. I lined my top lashline with l’Oréal carbon black liquid eyeliner and my lower waterline with Urban Decay 24/7 eyeliner in Zero.

9. Last step was to apply some mascara. I used Mac Zoom Fast Black lash mascara.

I hope you liked it… Thanks for reading… Have a nice day, or night depending on where you are.

Bye,

Mel xox

Tuesday, 24 January 2012

EOTD–Rainbow leopard eye

Hey bloggers,

This post is about a look I did today. It is super bright and fun and I really like it because I find that look really shows that makeup is an art. So, for this look, I’ll just write the products I used because it’s a really long list.

Products used:

- BH cosmetics 88 tropical shimmer palette (yellow shade, blue shade and cream highlight color)

- L’Oréal HIP duo in adventurous (bright pink)

- Nyx e/s trio in Orange/Golden Orange/Peach (Orange)

- Mac e/s in Purple shower (Purple color in outer corner)

- Nyx e/s trio in olive grove (Middle lime green shade)

- Mac e/s in vibrant grape (Crease purple)

- Artdeco e/s in color 361 (darker pink color)

- Urban Decay 24/7 liner in Mildew (green)

- Urban Decay 24/7 liner in Electric (blue)

- Urban Decay 24/7 liner in Zero (black)

- L’Oréal télescopic felt tip liner in Black

- Mac Zoom fast black mascara

So, this is the look. I hope you liked it. Everybody have a nice day and feel free to comment.

Mel xox

Monday, 5 December 2011

EOTD - Purple party look

Hey Bloggers,

Sorry if I wasn’t able to post for a long time. I was so busy at my school, work and much more… So, this weekend was my staff party and I had the chance to dress up a little bit. So, what I decided to do was a nice purple eye with subtle glitters paired with peachy-pink blush and nude lips. So, this is the look I created for the party and I think it’s bright, fun to wear but is still really flattering.

1. I applied Urban Decay Primer potion to my lid to prime my eyes.

2. Using a short dense shader brush (Sigma E55), I applied the shade Babe from Kat Von D’s True love palette on the inner two thirds of my lids.

3. Using the other side of the same brush, I applied Shiba from the same palette which is just a little bit darker on the outer third part of my lid.

4. Then, to blend out the colors, I used a flat blending brush similar to Mac 217 (Sephora #29) to apply Mac’s Vibrant Grape eyeshadow in my crease to soften the look and blend out any harsh lines.

5. I then, used a small pencil brush (Sigma E30) to apply Mac Fig 1 eyeshadow to the outer corner of my eyes creating a slightly triangular outer corner almost following the natural shape if my eyes.

6. Switching to a small angled liner brush (Sigma E65) I lined my bottom lash line with the same eyeshadow.

7. After that this step is optional, but I went back to brighten the two first lid colors I used to really make the look pop. Also, to make my inner tear duct pop, I applied Missy from the Kat Von D palette which is a white color with Blue/Purple shimmers.

8. Then, I really like glitters and shimmers so I added a liquid glitter liner from Lise Watier in the Purple color. (You may have to layer this product to get a really intense shimmer)

9. Next, I lined my eyes using two different products. I dipped my Urban Decay 24/7 liner in Zero in my Maybelline gel liner in black to get a super intense black line.

10. Last step, add mascara and if you want even false lashes to finish the look. (I don’t really wear false lashes so I didn’t)

So, that was the look. I hope you liked it and it was really fun to wear and I really liked to use these colors because I think I don’t use them often enough.

Bye,

Mel XOX

Friday, 28 October 2011

EOTD - Egyptian queen Halloween makeup tutorial

IMG_4731IMG_4736

Hey Bloggers,

So at school our day to get dressed was yesterday so I decided to be Cleopratra/Egyptian Queen. I really like how I was able to play with the makeup and wear something more exotic and dramatic than what I would usually wear. What makes this look so dramatic really is the liner so, maybe you could turn this Halloween look into an everyday look by putting on less liner.

There are the steps to achieve this look:

1. I primed my eyelids with Urban Decay primer potion as usually.

2. I applied Mac Amber Lights eyeshadow all over my lid.

3. In my crease, I used the darker matte color from my Kat Von D palette in Saint.

4. As a highlight, I applied Urban Decay Virgin from the Naked palette to my brow bone and my tear duct.

5. Then it’s the step to make the look come alive. I used my l’Oréal carbon black liquid liner to line my eyes with a thick line and than created a really dramatic wing. I did a straight wing while usually I would go for a wing that’s more oriented to my brows. After that, I used a gel liner from Maybelline to line around my inner corners and to line my bottom lashline. At the inner corners, I did a little flicked the liner down a little bit past my tearduct.

6. I lined my waterline with Urban Decay 24/7 eyeliner in Zero.

7. I applied one coat of my current favourite mascara Mac Zoom Fast Black Lash mascara.

8. After that, I applied false lashes. I usually don’t wear false lashes because I already have really long lashes but I felt that with the really thick liner I did, it almost made my lashes disappear and anyway at Halloween we all like a little bit more drama!

9. For this look, I wore a wig because I don’t think Cleopatra was blond! So, to match the wig a little bit more, I used Urban Decay’s Buck eyeshadow to fill in my brows.

So that’s it that was the look. I hope you liked it.

Mel XOX

Friday, 23 September 2011

EOTD–Green eye tutorial

IMG_4461IMG_4480IMG_4460

Hey Bloggers,

Sorry if I wasn’t able to blog a lot during the past weeks. It’s because school started again and I have a lot less time to blog and as you all know, the first days or weeks at school can be crazy! But, I’m back now an I hope I will be able to post more regularly.

This is just a green eye look I did using some products I have in my makeup collection that I don’t use often. There’s the list of products used:

- Shimmery light green eyeshadow from BH Cosmetics 88 Tropical Shimmers palette.

- Darker matte green eyeshadow from BH Cosmetics 88 Neutral palette

- Any matte skin tone color to use as your highlight.

- Urban Decay 24/7 eyeliner in Mildew.

- Urban Decay 24/7 eyeliner in Zero.

- Covergirl lashblast mascara.

Hope you liked it…

Please comment and subscribe.

Thanks, Bye xox

Thursday, 1 September 2011

EOTD–Bright pink and purple look.

Hey bloggers,

This is a look I created pretty much using a bunch of random products and that’s the look that I got, I hope you enjoy this look. (Ps. I primed my eyes before and added Nyx Milk jumbo eyeshadow pencil)

1. I putted the pink color from my L’Oréal HIP duo in Brazen on the inner third of my eyes.

2. I putted Mac’s Purple Shower on the middle third of my lid.

3. On the outer third, I applied the purple color of my L’Oréal Hip duo in Wicked.

4. In my crease, I didn’t have the color I really wanted so I mixed a shimmery blue eyeshadow, a light bright purple eyeshadow and a darker purple eyeshadow from my BH Cosmetics 88 Tropical shimmers palette.

5. I blended out the crease color using a matte eyeshadow that’s slightly darker than my skintone. I used one from my Too Faced Natural eye palette. (You could use on of the shade from the Naked palette or any other similar shade that works for you)

6. I did the same transition as on my lid on my lower lashline.

7. I applied a matte highlight shade a little bit lighter than my skintone from the same palette that I just used

8. I lined my upper lashline with my Physician’s Formula pen liner. I did nothing fancy. Just a line and a little flick at the end.

9. I lined my lower waterline with Kat Von D’s autograph pencil in Black metal love.

10. I applied two coats of my Cover Girl lash blast mascara and that finished the look.

Hope you liked it… Please comment and subscribe! :)

Tuesday, 30 August 2011

EOTD–Dark purple look with double winged liner

Hey bloggers,

This is a look I did using mostly my Kat Von D True love palette. There are the steps to create this look.

1. I used the white shade with purple reflex on the inner third of my lid.

2. I used the bright lighter purple on the middle third of my lid.

3. I used the medium purple on the outer third of my lid.

4. I blended everything so it fades from the lighter purple to the darker purple without harsh lines.

5. I applied the darker purple which is more of a black with purple shimmers in my crease.

6. I applied the matte black shade on the outer v area of my eyes to darken that area.

7. I blended the crease color out using a matte eyeshadow a little bit darker than my skin.

8. I applied a matte highlight color a little bit lighter than my skintone.

9. I created the same pattern on my lower lashline. After I was done, I thought this look needed to pop a little bit more so I added Urban Decay’s 24/7 liner in ransom in the middle third.

10. I lined my upper lashline with my Physician’s formula pen eyeliner and I lined my lower waterline with Kat Von D’s eyeliner in Black metal love.

11. I added two coats of my Cover Girl lash blast mascara and that finished the look.

I really hope you liked this look. Any comments or suggestions would be appreciated. Feel free to subscribe.

Sunday, 28 August 2011

EOTD–Summer natural party look

IMG_4368

Hey Bloggers,
This is a look I created using my Urban Decay Naked palette. I wore this look the other for a night out with my friends at a dance. I didn’t want to do too much makeup because first I was in a rush and didn’t have a lot of time and second it’s summer time so I feel like I like wearing less makeup in the summer.
Products I used:
- Urban Decay Naked palette
- Mac beauty powder in Blush of Youth
- Rimmel’s natural bronzer in Sunlight
- Revlon’s photoready foundation
- Rimmel’s concealer
- Rimmel’s Stay Matte powder
- Physician’s formula pen eyeliner
- Urban Decay 24/7 liner in zero
- Cover girl lash blast mascara
- Mac lipstick in Lollipop loving
So this is the look. I think even if I wore it for a night out, I would probably still wear this look on day time because it’s not too much for my taste. The only thing for day time that I would do is I would wear a matte highlight from another palette instead of the shimmery highlight from the Naked palette that I used there. I hope you liked this look. I know I’m doing more natural looks for the past looks I did but I’ll try next time to do a fun bright tutorial.

Sunday, 21 August 2011

EOTD–Everyday makeup for school or work

Hey bloggers,

This is pretty much the look I like to wear everyday for school or work. I like it because it’s natural but really makes your eyes pop. I also like to switch the products I use and change every day to create different versions. It’s really easy to achieve. There are the steps with no specific products so you can use whatever you have:

1. Prime your eyelids.

2. Apply a light shimmery champagne shade to your eye.

3. Apply a slightly darker shade to your outer V and crease area.

4. Blend all the colors together and blend to soften the outer edges of the darker color.

5. Apply a matte highlight shade that’s a little bit lighter than you skin tone.

6. Apply eyeliner to your lash line. You can use whatever form of eyeliner you want to use.(You can skip this step if you want)

7. Apply eyeliner to your waterline.

8. Apply your favorite mascara and you are good to go.

I hope you liked this everyday look. I find sometimes it’s nice to do celebrity inspired looks or dramatic looks but what pretty much every woman wears everyday is more simple and natural so I also think that kind of makeup is really important.

Monday, 1 August 2011

EOTD #15–Pink and black cut crease look

This is the same look that I just did the other day but I just wanted to add a little bit of color for peoples who like colors. The only thing I did was add a shade of pink on the lid where the skin tone color was. What I like about this look is that it can be done with any colors you want. I think it would be really pretty with purple! I know purple is my favorite color and I wear it everyday. Also, I think to make the look pop a little bit more and add more fun, you could add some glitters on top of the colourful shadow you added. I think it would have a nice effect. But, remember to keep the outer corner and the crease matte because you still want some definition in theses areas.

Mel Red heart

Saturday, 30 July 2011

EOTD #14– Black cut crease smokey eye

IMG_3823IMG_3824IMG_3827IMG_3831IMG_3833

A little while ago, a girl posted about a picture on luxe about this look. She said that she can do smokey eyes and have tried to copy the look in the picture and she wasn’t able. That was kind of a challenge for me. I’m not used of copying looks from pictures but I think this one turned out to be very similar to the look in the picture. The look is pretty much a light skin colored shade on you lid and a dark black shade to contour your crease and outer V coming on the lid. So this is how I created it step by step:

1. I applied a shade a little bit lighter than my skin tone to all my lid up to my eyebrow.

2. I applied the black shadow where I wanted it using a small angled brush E65 (Mac 266) I would usually use to put on eyeliner. Don’t worry about blending at this point we’re going to come back later for blending.

3. I used my Sigma E30 pencil brush (Mac 219) to darken the crease and outer V and start to blend a little bit the black out.

4. Being careful not to go in to much, I started blending with my Sigma E40 tapered blending brush (Mac 224) just at the edges of the black shadow. After this step, I reapplied the black eye shadow to add the intensity I lost. You can repeat these two steps as much time as you need to get the desired intensity of the look.

5. To blend out the outer higher edges of the black shadow, I used a brown a little bit darker than my skin tone to act as a transition color. I blended it in the black with a Sigma’s E25 which is a smaller blending brush (Mac 217)

5. I reapplied the lighter shade all over my lid and under my brow where there could have some fallouts.

6. I then lined my eyes with the black shadow with the same angled brush I used earlier.

7. I applied black eyeliner to my waterline and added two coats of mascara and the look was done.

So, that’s the look… It ended looking really similar to the picture that I saw on luuux. I hope you liked it (:

Please rate, comment and subscribe!

Mel xox

Back to Home Back to Top MelPatinage21. Theme ligneous by pure-essence.net. Bloggerized by Chica Blogger.